
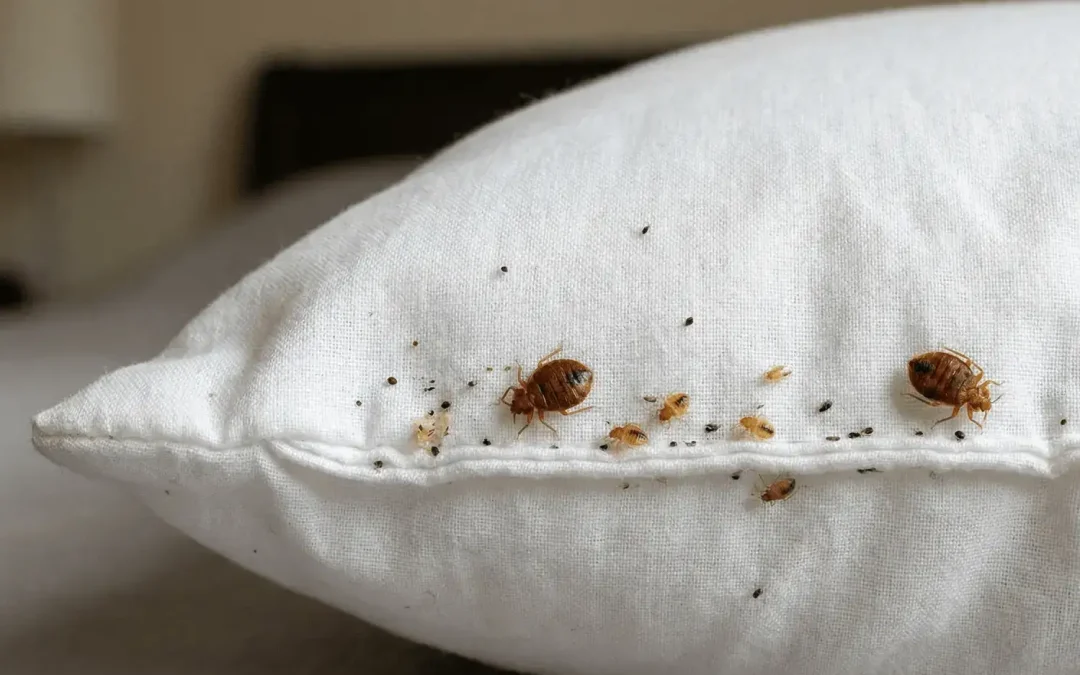
Discovering bed bugs is stressful enough. The last thing you want is to realize, after the technician has already arrived, that your home was not ready. Proper bed bug treatment preparation is not just a formality. It directly affects how effective the treatment is, how quickly the problem is resolved, and whether you need additional visits down the road.
Here is what you actually need to know before treatment day.
Why Preparation Matters (And When It Does Not)
Most pest control companies will give you a long preparation list. Hours of work. Sometimes days. Strip the bed, bag every item, empty every drawer, leave the property for the day.
That level of disruption is not always necessary, and in some cases, it can actually work against you. Moving infested items from one room to another is one of the most common ways people accidentally spread bed bugs further into their home.
Before assuming you need to do everything on a traditional checklist, confirm what your treatment method requires. Chemical treatments typically involve more preparation steps. Heat treatment, which uses high temperatures to eliminate bed bugs at every life stage, often requires far less.
If you are using We Clean Pest Control, our heat treatment approach is designed to work with minimal preparation, one of the few in the industry built around not disrupting your household unnecessarily.
That said, some preparation steps are universally helpful regardless of the method being used.
The Bed Bug Heat Treatment Preparation Checklist
If your treatment involves heat, the goal of preparation is simple: allow airflow and heat to reach as many surfaces as possible without moving infested items to clean areas. Here is what to do:
- Do not move items between rooms. This is the most important rule. Carry infested belongings into unaffected areas and you risk spreading the infestation before treatment even begins.
- Remove items that could be damaged by heat. This includes candles, aerosol cans, certain medications, and anything heat-sensitive. Your technician should provide a specific list in advance.
- Clear access to baseboards and furniture. Pull beds and large furniture slightly away from walls so heat can circulate around and behind them. You do not need to empty drawers or disassemble furniture.
- Bag and remove pets, plants, and any food that is not sealed. These should leave the space during the treatment window.
That is the core of a realistic bed bug heat treatment preparation checklist. It is considerably less than what most competitors ask for, and that is intentional.
Laundry: What to Wash and How
Bedding, clothing, and fabric items in an affected room should be laundered before or immediately after treatment. The key is heat.
A standard washing machine cycle alone is not enough to kill bed bugs reliably. The dryer is what does the work. Run items on high heat for a full 30 minutes, not just a quick tumble. Once items come out of the dryer, seal them immediately in clean plastic bags. Do not leave them sitting on an infested surface.
A few important points:
- Wash items in place, in sealed bags, and carry them directly to the laundry area without setting them down in other rooms
- Dry-clean-only items can often be handled with a cold dry cycle and then a professional dry cleaning service, confirm with your technician
- Do not pile clean items on the bed or furniture until treatment is complete and the area has been cleared
How to Prepare for Bed Bug Treatment Without Making Things Worse
The most common preparation mistakes people make tend to come from good intentions. Knowing what not to do is just as important as knowing what to do.
- Do not apply any pesticides yourself before treatment. DIY sprays can scatter bed bugs and push them deeper into walls or furniture, making them harder to reach and treat.
- Do not throw out your mattress. This rarely solves the problem and often spreads bugs to other rooms in the process. A mattress encasement, a zippered, bug-proof cover, is a far more effective option. Encasements trap any surviving bugs inside, cutting off their access to you while preventing new ones from taking up residence in the mattress seams.
- Do not vacuum and then leave the vacuum inside. If you vacuum infested areas before treatment, remove and seal the vacuum bag in a plastic bag immediately afterward. Place it directly in an outdoor bin. Leaving a vacuum with bed bugs inside it next to clean areas defeats the purpose.
If you need to know how to prepare for bed bug treatment in a way that actually protects your household, the answer is: do less moving, do more sealing, and defer to what your technician specifically recommends for the method being used.
After Treatment: What Comes Next
If you are in the Edmonton area, you can get bed bugs removed in Edmonton with a treatment approach that prioritizes effectiveness and minimal disruption, including post-treatment guidance so you are not left figuring it out on your own.
Preparation does not stop when the technician leaves. The weeks after treatment are when most people either lock in their success or accidentally undo it.
Place bed bug interceptors, small plastic traps, under each leg of the bed frame. These catch any surviving bugs that try to climb up. Check them regularly for the first few weeks. They are also one of the best early-warning tools available if any activity resumes.
Keep your mattress encasement on for at least a year. Bed bugs can survive without feeding for several months, and any bugs trapped inside the encasement will eventually die. Removing it too early puts you back at risk.
Frequently Asked Questions
How much preparation is really required for a bed bug treatment?
It depends on the method. Chemical treatments generally require more extensive preparation than heat treatments. At minimum, you should address laundry, remove heat-sensitive items, and avoid moving anything between rooms. Your technician should give you a specific list based on what is being used.
Do I need to throw out my furniture before treatment?
In most cases, no. Discarding furniture often spreads the infestation and is rarely necessary with professional treatment. Encasements for mattresses and box springs are a better solution, they are inexpensive and eliminate the need to replace bedding.
How long do I need to stay out of my home during treatment?
This varies by treatment type. Heat treatments may require only a few hours away. Chemical treatments may require longer. Confirm timing with your technician before treatment day so you can plan accordingly.
Can I sleep in my bed after treatment?
Often yes, but confirm with your provider. For heat treatments, the space is typically safe to return to the same day once it has cooled. For chemical treatments, there may be a longer waiting period depending on what was applied and where.
If you are seeing activity after treatment, contact your pest control provider right away. A good guarantee means something, and documenting what you are seeing with photos helps move the process along quickly.
For those managing a rental unit or multi-unit building, post-treatment monitoring across adjacent units is especially important. Bed bugs move between units through shared walls and utilities. Treating one suite without monitoring neighboring ones is a common reason infestations return.

Recent Comments